Sunday, October 29, 2023

Amazing Turkey Brine! Smoking' Turkey!


Fantastic Savory Turkey Brine & Smoked Turkey

Simmer and then cool the brine. You can leave it covered at room temperature in a sauce pan while you roast the turkey.  You will be injecting the brine every 2 hours.

2 cups apple juice
2 cups water
1/2 cup salt
3-4 fresh garlic cloves
1 cube butter
2 cups brown sugar
2 tsp ginger
20 whole cloves
2-3 Tbs Lowery's Seasoned Salt

Inject into the breast, thighs, and legs

Rub with olive oil, paprika, seasoned salt, minced garlic, or favorite seasonings

Strain the garlic and whole cloves out and put inside turkey

Loosely cover with foil.

Inject the turkey every 2 hours while roasting

Cook until temperature reaches 180 degrees.

If smoking cook 15 1/2 lb turkey for 10-11 hours at 250 degrees.  Inject every couple hours when adding wood.  This can also be roasted in your oven.  We usually do this one in the oven and use the recipe below for smoking a turkey.


Smoked Turkey

For a 10-12 lb turkey

4 cloves of minced garlic
2 Tbs seasoned salt
1/2 cup butter
1 can of coke
1 apple quartered
1 onion quartered
1 Tbs garlic powder
1 Tbs salt
1 Tbs ground black pepper

Preheat smoker to 225-250 degrees
Use Hickory Pecan wood mix
Rinse turkey and pat dry.
Rub with crushed garlic and sprinkle with seasoned salt
Place in disposable roasting pan
Fill turkey cavity with butter, cola, apple, onion, garlic powder salt and pepper
Cover loosely with foil

Smoke at 250 for 10 hours or until temperature reaches 180 in thickest part of the breast and thigh.  Bast the bird every 1 -2 hours with juices.  You can also inject this with the above brine.


Fresh frozen veggies from the garden!

Sunday, October 15, 2023

Ripening Green Tomatoes Indoors


As mornings get chillier and the days get shorter, the demise of the summer garden is inevitable. As you harvest and prepare root crops, fruits, and winter squash for winter storage don't give up on the tomato.  The first frost does not need to end your tomato season!  Mature green tomatoes can be ripened indoors.


Some basic knowledge of you planting zone is helpful.  Do you know your average first frost day? The average first frost date is the average date at which a light freeze may occur.  There is a 50% chance it will occur before the date or after the date.  

Light Freeze:  29-32 degrees, tender plants killed

Moderate Freeze:  24-28,  widely destructive to most plants

Hard Freeze:  24 and colder with heavy damage

Look up your average spring and fall frost dates here:


 In New Harmony the average first frost is October 9th.  So when October comes you need to watch the weather to be prepared to bring in mature green tomatoes before a freeze.  As daytime temperatures fall below 60 degrees, tomatoes are less likely to ripen on the vine. You can pick green tomatoes at this point and bring them indoors to ripen and remove your tomato plants from the garden or wait until a frost is predicted.


Picking Green Tomatoes


The best tomatoes for ripening indoors come from young plants still in their prime not older worn out plants that have been bearing all season.

Most gardeners have volunteer tomato plants that spring up in random places in the garden which are perfect for producing green tomatoes late in the season.  

Before a frost gather your mature green tomatoes.  Do not bother with the small whitish colored tomatoes, they will not ripen.  Pick only the mature green or riper tomatoes.  A mature green tomato is well developed, shiny, and medium or deep green.  Pick without stems. (Root Cellaring)


Most importantly pick before frost because frost damage can prevent proper ripening.  Interestingly, tomatoes that have some color are less sensitive to low temperatures.

Bring the tomatoes inside and sort them. Separate riper ones from green tomatoes.  

Keep some out to ripen right away.  Green tomatoes ripen quickly at room temperatures.  Spread them out single layer out of direct light in a room with temperature between 60-70 degrees.  A mature green tomato will ripen at room temperature in about 2 weeks.  If the tomatoes are already starting to turn then they will ripen faster.

You can wrap them individually in paper, place them in a box in the pantry,  or keep them in a drawer to protect them from direct light.

To keep some tomatoes to ripen later, store them at temperatures of  55- 60 degrees to keep them on hold.  Bring a few fruits at a time into warmer room temperatures to gradually ripen and enjoy throughout the fall. (Root Cellaring)


As tomatoes ripen they produce a gas called ethylene.  Bananas and apples also produce this gas. This gas actually promotes ripening.  

To quicken the ripening process you can place a few tomatoes in a brown paper bag with an apple or banana with green still on the tips.  

Another way to save some of those tomatoes for later in the season is to pull up the whole vine and hang it in a garage or shed.  The remaining leaves and stem will continue to nourish the fruit.  Be sure to hang where there is good air circulation and do not pull them up wet or they may just rot.

A great resource for preserving your harvest into winter is found in the book Root Cellaring by Mike and Nancy Bubel. 

Hopefully you will be able to continue enjoying garden fresh tomatoes an extra 4-6 weeks after a frost.


Monday, October 9, 2023

Fall Garden Chores


 Signs of fall in my garden and yard are the return of the deer in my orchard and when my maple leaves and Virginia creeper start turning colors.  Fall with all its beauty is somewhat unpredictable in Utah.  We can have beautiful warm days then a cold chilly day warning you that winter is not too far off.  


Beautiful buck posing for the camera!  I usually have 3 or 4 hang out during hunting season.  This one was with one smaller buck and a doe and two older fawns.  Absolutely gorgeous.

The maple turning in the front yard.


 I still have veggies in the garden being harvested and a few fall crops but it is definitely time to clean out the garden and prepare for winter. 


Garden Chores:


  • Remove all spent plants including fallen leaves.
  • If you planted beans to harvest dry, cut the plants off at ground level.  Leaving the roots of nitrogen fixing legumes gives you the full benefits of these amazing plants.  To attain the benefits of the nodules of rhizobium bacteria you need to separate the vegetative part of the plant and allow the roots to decay in the soil.  I inter-plant lots of dried beans with summer crops for this purpose as well as for the harvest of dried beans.
  • Remove all weeds.
  • Spread a layer of compost, composted manure, or fresh grass clippings on the surface.  You can grow turf without chemicals. Growing a Lawn Organically  Use only chemical free clippings on your garden.
  • If you are done watering, drain and store any water pipes that do not need to remain in the garden through winter.
  • If you are growing fall and winter crops be sure to have row covers and a low tunnel in place to protect your crops. Below are some links to help you out with extending the season.

Celery hanging out with Marigolds

Chard which sweetens up with cool weather.

Kohlrabi planted in late August for a fall harvest.

Mustard greens for fall harvests.

Landscape Chores

  • Weed all flowers beds, around perennials, shrubs, and trees.
  • Cut spent flowers unless you want them for winter interest
  • Mulch around plants.  Mulch is anything that can be placed around plants on top of the soil to reduce water loss, prevent weeds, and insulate plants in the winter.  Organic mulches are the best option.  These could include compost, aged manure, fine pine wood chips, leaves, or grass clippings. 
  • Trees and shrubs need to go into the winter watered.  The moist soil acts like an insulator protecting roots from freezing.  Usually if you do one last watering around Thanksgiving that prepares them for winter.
  • Drain water systems 

I love these pale yellow marigolds.

I'm still enjoying the beauty of the season but with the size of my gardens I have to start now so I'm finished before its too cold to work outside.  These fall chores will ensure you are prepared to plant when the time is right and save you work in early spring.

Crab-apple

Tomatoes are still coming.

Pineapple tomato a beautiful and delicious heirloom.

Friday, October 6, 2023

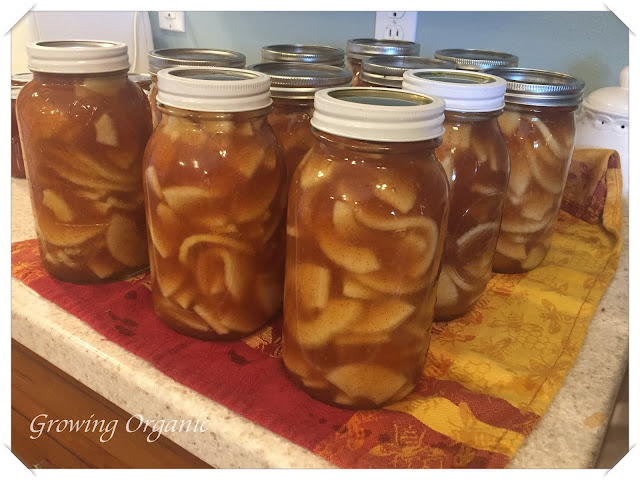
Canning Apple Pie Filling


Fall is my favorite time of year.  Always grateful for the good harvest  my family enjoys and the changes fall brings. With Thanksgiving approaching fall is always a time to reflect on my many blessings.  There are also so many delicious thing unique to fall....apples, apple pie, cider, pumpkins, winter squash, potatoes, and so much more.  Today I thought I would share a recipe for canning apple pie filling so you can enjoy apple pie all year.


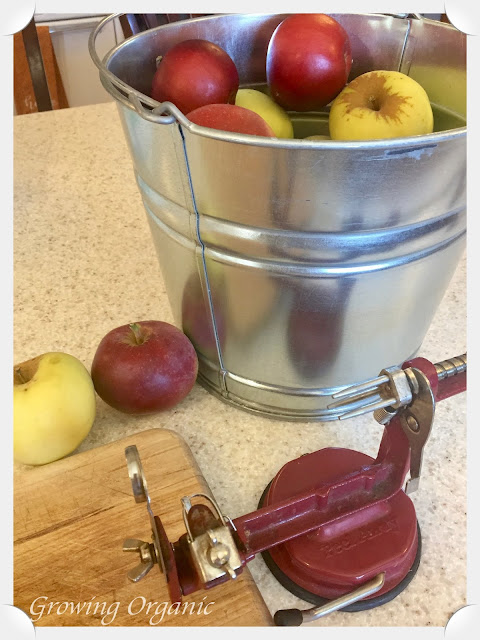
Basic supplies your will need include a water bath canner and your favorite canning gadgets, an apple corer peeler, and a heavy stock pot.

A few words on choosing apples.  Baking apples are tart, crisp, and hold their shape when cooked.  Always use firm, crisp, fresh apples and you will not be disappointed in the finished product. For this batch I used one of my favorite dessert apples Sundance.  This is a cross between a Golden Delicious, Macintosh, and Rome. It is very productive late ripening apple. Very disease resistant.


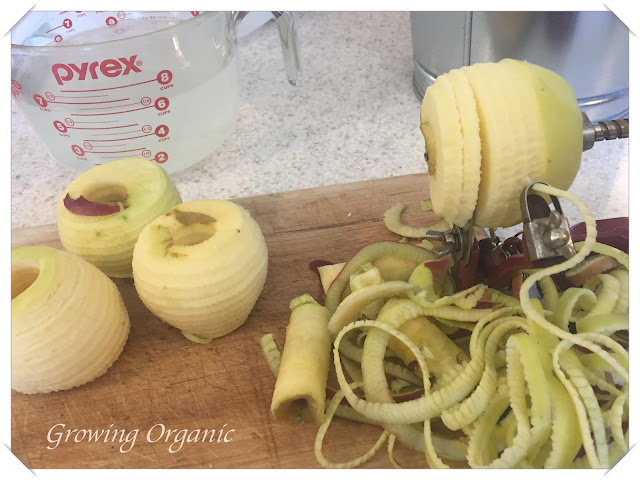
I use an apple corer to peel and core the apples.  It's quick and easy.  If you peel and core the apples by hand slice in no bigger than 1/2 inch slices.

Prep:  

  • Wash apples
  • Have a bowl of cold water with lemon juice or ascorbic acid to slice apples into to prevent browning.
  • Slice around 4-6 cups then blanch that batch and add it to the filling
  • Have a shallow pot of water on the stove which will be used to blanch the apple slices
  • Have jars, lids, and rings prepped


I first prepare the pie filling and cover it with a lid.  I then peel and core the apples about 4- 6 cups at a time blanching each batch for less than one minute. Blanching removes the oxygen from fruits such as apples and pears and prevents browning.  I then drain the slices in a strainer and add each batch to the filling stirring until covered.  Repeat peeling, coring, slicing, and blanching until filling is full of apple slices.  One quart of pie filling requires about 3 1/2 cups of apples. 


A word about blanching the apples.  Don't skip this step.  Apple as well as pears have a lot of oxygen in the flesh.  Blanching forces the oxygen out and the canned product will not brown.


Quantities of Ingredients Needed

Blanched sliced fresh apples                    3 1/2 cups            6 quarts
Granulated sugar or super fine sugar      3/4 c + 2 Tbsp    5 1/2 cups
Clear Jel                                                    1/4 cup                1 1/2 cups
Cinnamon                                                 1/2 tsp                  1 Tbsp
Cold Water                                                1/2 cup                2 1/2 cups
Apple Juice                                                3/4 cup                5 cups
Bottled Lemon Juice                                2 Tbsp                    3/4 cup
Nutmeg (optional)                                    1/8 tsp                    1 tsp


Prepare filling:
     Combine sugar, clear gel, cinnamon in a large kettle add cold water and apple juice.  If you like nutmeg add it at this time.  I personally do not like nutmeg.  Stir and cook on medium heart until mixture thickens and begins to bubble.  Add lemon juice and boil one minute longer stirring constantly.  Set aside cover with a lid.


Prepare Apples:
    Peel, core, and slice apples about 6 cups at a time.  Blanch each batch in boiling water for 1 minute. Drain in a strainer and fold hot fruit into  the filling.  Continue preparing batches 6 cups at a time until done. 


Processing Apple Pie Filling:
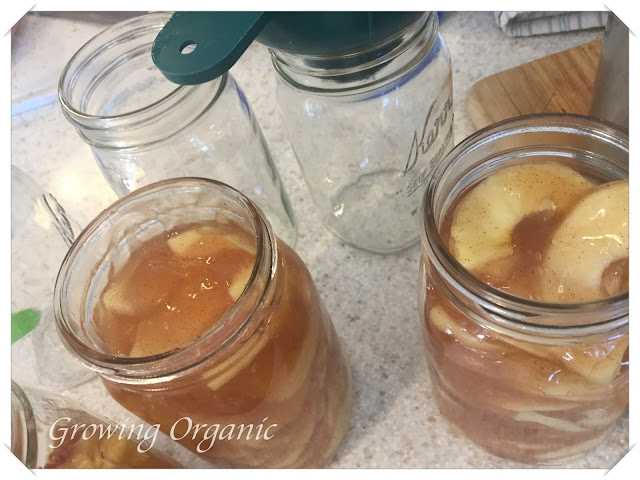
Fill jars with mixture leaving 1 inch head space.  Adjust lids and process in a water bath canner.  Start timing when boiling.  Remove lid after processing time and let jars remain in the canner for 10 minutes this prevents siphoning of liquid. 

Pints or Quarts Processing Time

0-1,000             25 minutes
1,001-3,000      30 minutes
3,001-6,000      35 minutes
6,001-above     40 minutes

After jars are sealed and cooled remove lids and wipe down ring area. Store without the rings.