Wednesday, August 30, 2023

Zucchini Pizza Bites


There are always those zucchini that hide from you and get bigger than you would like. Strange how they go unnoticed. Here's a quick, delicious recipe for those over grown zucchini.

Ingredients:

- Large zucchini

-Pizza sauce (I use my own homemade canned pizza sauce)

- Mozzarella cheese shredded

- Parmesan cheese shredded

- Pepperoni 

-Other favorite toppings such as pineapple, peppers, tomatoes, olives, onions, etc

- Oregano, basil, garlic salt, pepper, red pepper flakes, any seasoning combination you and your family like.


  1. Cover a large cookie tray with foil
  2. Slice zucchini about 1/4 inch and spread out on the tray
  3. Top with pizza sauce
  4. Add mozzarella cheese
  5. Pepperoni and other toppings
  6. Top with parmesan cheese
  7. Sprinkle with seasonings
  8. Bake in a preheated oven of 450 F for around 10 minutes or until zucchini is tender.
  9. Turn oven to broil  for a few minutes to melt cheese til bubbly.  Be careful not to burn your cheese.


These a delicious reheated.  A zucchini pizza bites make a great side dish, appetizer, or snack.  Kids would love to help with this one.  


Tuesday, August 29, 2023

Fresh Peach Pie


Sometimes the best way to enjoy the harvest is fresh.  Nothing beats fresh peach pie especially when the peaches are harvested from your orchard.  This pie is irresistible when made with white peaches which are sweeter than yellow peaches.  White fleshed peaches are best eaten fresh.  They are also delicious dried and make an amazing juice.  They are too soft to can.  The canning peach is the yellow peach.  This year all my white peaches froze so yellow peaches were used in the pie.  I didn't get many peaches so most of them were enjoyed fresh. 

Fresh Peach Pie

1 cup sugar
2 Tbs of cornstarch
1 cup of water
1 small pkg of peach gelatin
2 Tbs lemon juice
 
Combine the sugar and cornstarch in a saucepan.  Whisk it together.  Add the water and stir. Heat the mixture until it thickens.

Add 1 small pkg of peach gelatin

Stir until dissovled and remove from heat. Allow to cool.

Slice 3-4 cups of peaches.  Add peaches and 2 Tbs of lemon juice.  Fold together gently.  Pour into a baked pie crust.  Refrigerate for a couple of hours before eating.  Serve with cool whip. Enjoy!


Monday, August 28, 2023

Spicy Peaches


The end of the summer means peach days!  Not only are peaches delicious fresh eating but the are, in my opinion, one of the best canned products.

This is my families favorite canned peach recipe.  It comes from Better Homes and Gardens Special Interest Publications Canning.

The following recipe does 7 to 8 quart jars.


10 1/2 /cups of water
4 1/2 cups of sugar
24 whole cloves
4 cinnamon sticks
16-20 lbs of ripe peaches

For the syrup:
In a heavy pot combine the water, sugar, cloves, and cinnamon sticks.  Bring to boil stirring until the sugar dissolves.  Simmer for 5 minutes.  Keep hot while you prepare the peaches.


Peel peaches, cut in half, and cut into slices.  To prevent oxidation, slice peaches in a pre-treatment dip of a lemon juice and water or ascorbic acid treatment.


Canning:
Rinse peaches and put in hot sterile jars, the dishwasher is great for keeping jars hot.  Remove cinnamon sticks and cloves.  Ladle hot syrup of peaches.  Remove air bubbles. Leave a 1/2 inch headspace.  Wipe rims and adjust lids.


Process in a boiling water canner for 25 minutes.  Adjust for altitude if necessary.  Here in New Harmony at 5000 feet you need to add 10 minutes to the processing time.


When the processing time is complete, turn off heat and remove canner lid.  Allow to sit for 15- 20 minutes before removing the jars from the canner.  This prevents any liquid from seeping out.


Wednesday, August 23, 2023

Seasoned Tomatoes: Italian, Mexican, & Cajun Spice Blends


I love having these canned tomatoes on my shelf!  Italian, Mexican, and Cajun seasoned tomatoes are one of the tomato product I use the most in cooking. They always have a place in my pantry.  Any recipe that calls for diced, crushed, or whole tomatoes I choose one of these seasoned tomatoes whose herbs will enhance the recipe.  The Italian seasoned tomatoes are a must in pasta dishes.  The Mexican seasoned tomatoes in taco mixes, Mexican soups. beans, or rice dishes.

I love the blend of herbs in each of these recipes.  All these recipes come from Ball Complete Book of Home Preserving.


Preparing the Tomatoes

Wash the tomatoes.  I submerge the tomatoes in water. I wash all the tomatoes then get a saucepan with water boil. You can use either slicing or plum tomatoes.  Some heirloom varieties may be too juicy but some are fine for canning.


Skin the tomatoes.  


The easiest way to skin tomatoes is to submerge them in boiling water for 30-60 second. Then submerge them in ice water This causes the skins split and the tomato slips easily out all ready to slice.  I don't not leave them in the boiling water longer than this or it cooks them.  The skins will peel easily even if the skin is not split.  Have a tray ready to put all the tomatoes on. Finish all the tomatoes then go on to prepare the jars and herbs.


Use a tray with sides so you don't have juice everywhere.


Prepare the jars, water bath canner, and herbs

Sterilize your jars.  I do this in the dishwasher and leave them there until I need them.  Prepare the lids and rings.  Fill the canner with water and have it on the stove.  Add a little vinegar if you have hard water.

Choose the spice blend and quantity desired.  Mix in a small bowl.


Italian Spice Blend


Dried herbs                      2 Jars                 6 Jars
Basil                                1 tsp                  4 tsp
Thyme                             1 tsp                  2 tsp
Oregano                          1 tsp                  2 1/2 tsp    
Rosemary                        1/2 tsp               1 1/2 tsp
Sage                               1/2 tsp               1 1/2 tsp
Garlic powder                   1/4 tsp               1 tsp
 
For each pint jar, and only use pint jars for this recipe, use 2 1/4 tsp of the blended spices. You also need to add 1 Tbs of lemon juice to each pint jar.

 Mexican Spice Blend

Dried Herbs                    2 Jars                   6 jars
Chili Powder                      2 tsp                    6 tsp
Ground Cumin                  1 tsp                    2 tsp
Oregano                          1 tsp                    2 tsp
Garlic powder                   1 tsp                    2 tsp
Ground coriander              1 tsp                   2 tsp
Seasoned Salt                  1/2 tsp                 1 1/2 tsp

For each pint jar use 2 1/2 tsp of the spice blend.  Add 1 Tbs of lemon juice to each pint also.


With the spice blend and lemon juice in the jars you are ready to fill the jar.
 

Add desired spice blend and 1 Tbs of lemon juice to each jar. 


 A helpful tip is to place your cutting board in a tray.  The tray will trap the juices of the tomatoes so you don't have such a mess.


Fill the Jars

Dice the tomatoes and fill the jars leaving 1/2 inch of headspace.  You will be using the tomatoes own juice as your liquid so as you add the tomatoes, press down with a spatula to release the juices.  Release air bubbles as you go.

Wipe the rims and adjust lids.  Process for 40 minutes in a water bath canner.  I add 10 minutes because of my altitude.  When the time is up remove the lid and leave jars for 10 minutes in the canner.  Remove from the canner and let them cool.

When the jars are cool check your seals, remove the rings, and wipe the jars clean.  

Enjoy having these beautiful, delicious tomatoes in your pantry!


The jar on the right is Old Ivory Egg, an heirloom variety which is fun to have on hand to cook with.  It's nice mixed with the red tomatoes.
The recipe for the Cajun spice blend is in the book.


Monday, August 21, 2023

How to Tell if a Watermelon is Ripe


Nothing is more exciting than watching those watermelons size up.  Don't be too anxious to pick until you know it's ripe.  Once picked a melon will not continue to ripen, and if left on the vine too long it becomes mushy and will possibly split.  So here's three pointers to picking the perfect melon. 


  • Look at the bottom of the melon. There is a light white patch. When it ripens, it turns a pale yellow. 

  • Knock on the melon and it should sound someone knocking on the door. 
  • The tendril and cupped leaf closest to the melon should be dried up.  


The first two tips work when picking out a melon from the grocery store. However a home grown melon is sweeter and so delicious. Make room for them in the garden.

Saturday, August 19, 2023

Canning Blackberry Pie Filling


Who doesn't love a homemade blackberry pie?  If you grow your own berries or have access to berries at a farmer's market this is a great and easy way to process and preserve blackberries.  Pie filling can be used as a topping on a pound cake, ice cream, crepes, or waffles.  Honestly it's amazing out of the jars but you should be good and mix it with something else.  


When choosing berries they need to be firm to hold up.  Vine ripe berries are dull and very soft.  Those are perfect for eating fresh or jams but the shiny firm berries with full color are better for pie filling, canning whole, and for preserves.  During berry season I pick every other day.  I use them immediately.  Wash well and sort as you wash those for the pie filling and those that are too soft you can make into a batch of jam.

You can also use frozen berries.  Retain the juice and use if you are using frozen fruit.


Making the Pie Filling:

Whisk sugar, ClearJel, cinnamon, and the cold water together.  Heat, stirring constantly until thick.  You will notice clumps of gel forming which is normal as it continues to heat the filling will turn clear and become evenly thick.

Filling before it thickens.  The cinnamon gives it the color.


Whisk in the bottled lemon juice.

Add the fruit.  Gently fold into the filling.  Do not over stir or you will not have whole berries.  I let it heat on low stirring occasionally for 10 minutes.


Ladle hot pie filling into clean quart jars. Use plastic spatula to remove air bubbles.  Leave a 1" headspace.  This is important for the jars to seal and prevent the filling from seeping out. 

This green canning spatula is great for removing air bubbles and determining headspace.


I like to use wide mouth they are easier to fill.  Ripe rims and place lids and rings on jars. Lids should be heated in a pan of water until bubbles appear.  Dry before place on jars.


The water in the canner should be boiling when you place the jars in the canner.  Be sure that lids are covered by an inch of water. Bring back to a boil after adding the jars and process for the appropriate time which varies according to your altitude.

Start timing after canner is boiling.  Remove lids and let the jars rest in the canner for 15 minutes then remove to cool.

After jars are cooled remove the rings and wipe down jars.  I never store canning products with rings.  You want clean jars when you store your products. Wipe down the rims and jar in case any product leaked out. Test for a seal.

Enjoy this delicious pie filling!  


Recipe:
                            1 Quart                7 Quarts
Blackberries        3 1/2 cups          24 1/2 cups

Cold water        1 1/2 cups            10 1/2 cups

Sugar                1 cup                    7 cups

ClearJel            1/4 cup                1 3/4 cups

Lemon Juice    3 TBS                     1 1/4 cups

Cinnamon                                        1 tsp

You can do half blackberries half raspberries.

Processing Time For Water Bath Canner for both Pint or Quart

Altitude     0-1000ft    1001-3000ft    3001-6000ft    >6001

Minutes        30              35                   40                    45


Wednesday, August 16, 2023

Saving Dill Seed


If you have ever grown dill and let it go to seed, you are already a seed savers. Pretty easy, huh?  Congratulations! The hard part is remembering to harvest the seed so it doesn't self sow throughout your garden. I actually have dill scattered throughout my garden and pull it up where I don't want it.

Dill is a hardy annual grown both for it's leaves and seeds.  Dill leaves can be picked anytime.  They are delicious in sour cream dips, on vegetables, and potatoes.


If you plan on using a dill head in pickles, harvest when there are both flowers and unripe seeds.  Pickles are not the only way to use dill heads.  Try a dill infused vinegar.

 Dill seed is easy to save.  The seed can be saved for seed for next year. The seed is also used to flavor breads, pickles, and has medicinal uses. The seeds are a mild sedative and digestive aid.  Sucking on dill seeds can calm the digestive system. 


Dill water has long been used to calm colicky babies.  To make your own dill water, steep a teaspoonful of bruised seeds in a glass of hot water for  a couple hours.  Strain then sweeten the mixture.  Adults can take 1 Tbs and children 1 tsp.  (The Complete Book of Herbs and Spices)

The seed head of dill can also be dried and used as dill weed in cooking.  Add it at the end of cooking so the flavor is not lost in cooking.


 In my garden lace wings  (a beneficial insect)  love to lay their eggs on dill stems.  The larvae of the lace wing are voracious aphid eaters and therefor a gardeners friend. 


With so many uses dill seed is kind of a super seed and an easy way to start seed saving.

Below is a picture of lace wings eggs.  The look like lollipops.  The larvae look similar to lady beetle larvae.


Dill does not cross with any other veggies or herbs.  Different varieties of dill can be cross pollinated by insects.  If you want to try different varieties just wait to plant the second variety until he first has set seed.  This is called timed isolation.


A dill umbel or seed head.

Dill produces umbels.  Allow these to dry in the garden.  Harvest seed from fully mature dry umbels ( the seeds will be brown) whose stems are slightly green. Pick the entire umbel and place over trays to catch the seed.  Store the seed in a cool dry place if you are planning to replant.  Dill seed can be stored up to 5 years.  Remember germination rates decline with each year.


Monday, August 14, 2023

Corn Relish


Sweet corn all comes on at once.  So having numerous ways to preserve it is so helpful. You can also stagger the planting of 2 varieties so you have a longer season

 Corn relish is quick, easy, and delicious.  Since many people are unfamiliar with this yummy condiment here is a list of ways to use it.  Serve it on tacos, chili, beans and rice.  It is excellent with pot roast or any grilled or broiled chicken, pork, or fish.  You can add some to your favorite salsa or use it plain with tortilla chips. 

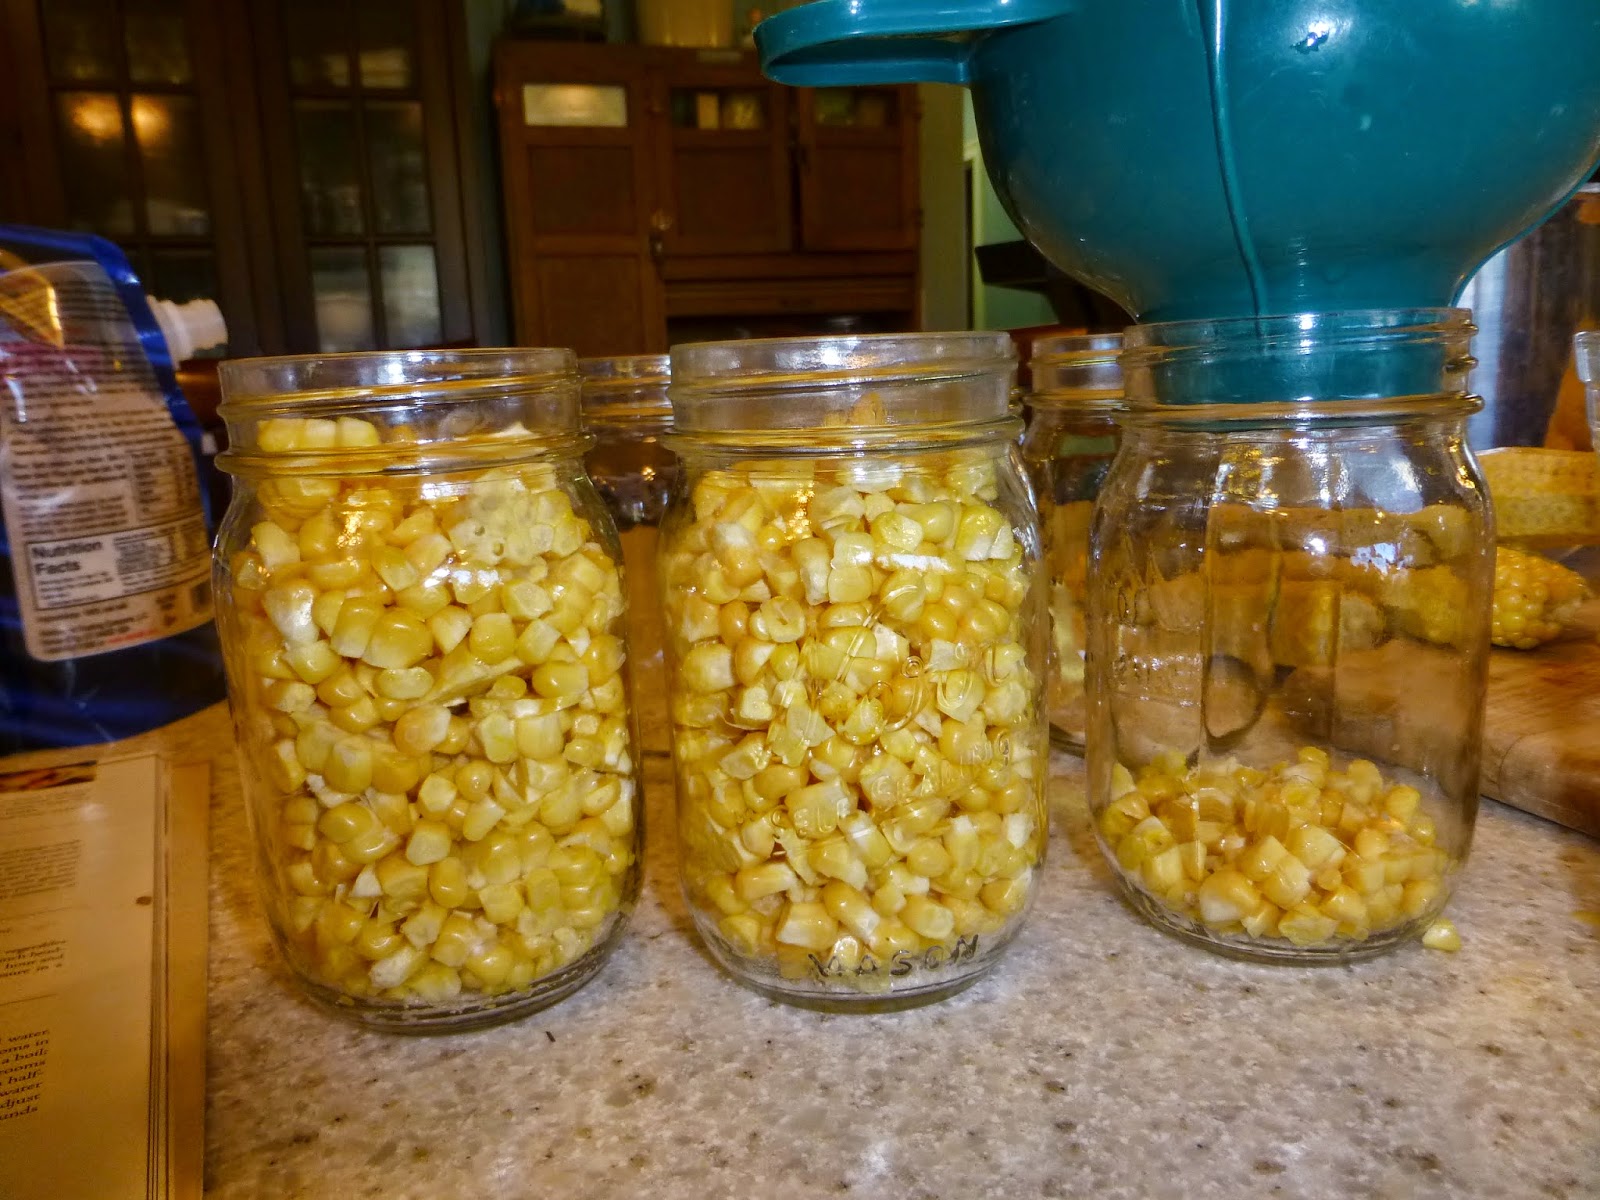
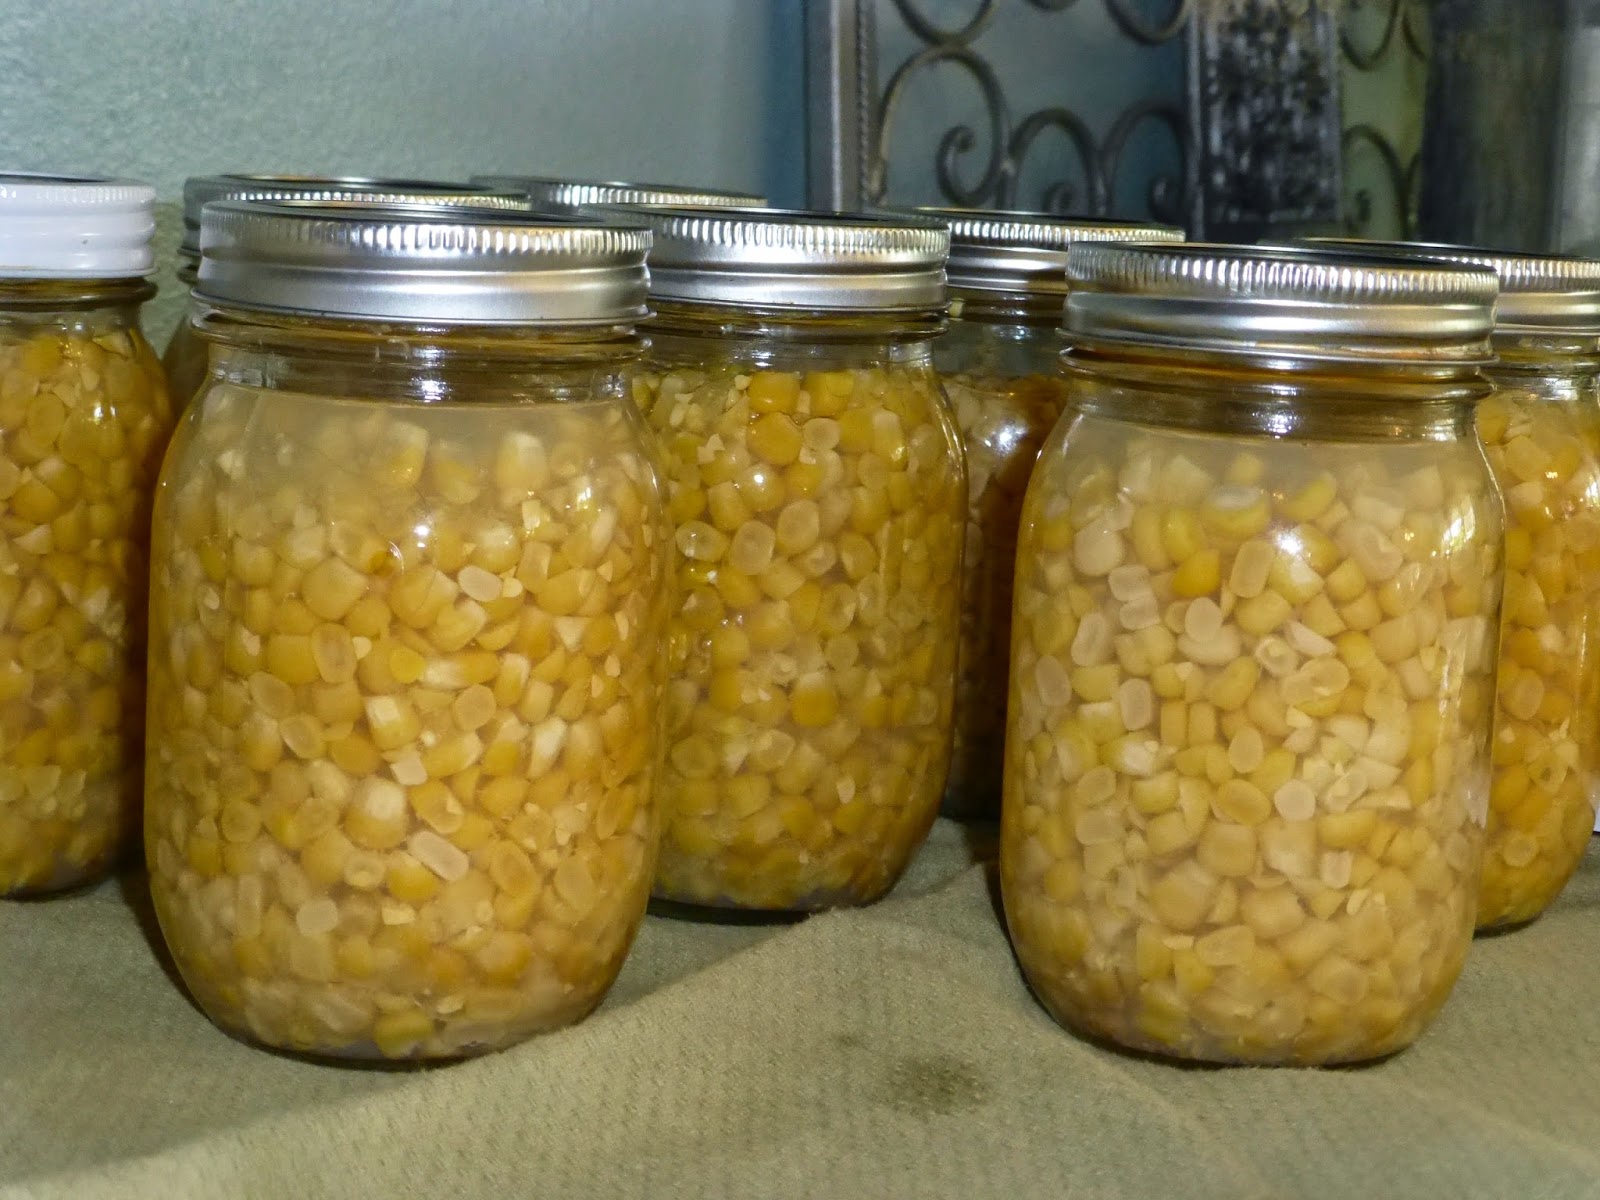
This is Jubilee.  I like to freeze and can with a yellow corn.  It seems to hold its color and makes a nicer product.
I am going to share three recipes so you have lots of options.


Corn Relish

9 cups fresh corn kernels (about 12 to 15 large ears)  you can use frozen corn

2 cups chopped onions

1 cup chopped green pepper

1/2 cup chopped red pepper

1 cup sugar

2 tablespoons salt

1 1/2 TBS celery seed

1 1/2 TBS mustard seed

1 tsp turmeric

3 cups cider vinegar

3 Tbs cornstarch or sure gel

3 Tbs water

In a stainless steel stock pot combine all the ingredients except cornstarch and water.  Bring to a boil stirring frequently. 

Mix cornstarch or sure gel with water and add to pot stirring to thicken.

Cover and reduce heat simmer for about 15 minutes stirring occasionally or until it thickens and peppers turn a dull green.

Ladle the relish into hot jars, leaving a 1/2 inch headspace.  Remove air bubbles.  Wipe jar rims and apply hot lines and bands.

Process pint jars in a water bath canner for 15 minutes (add 10 for high altitude)

Turn off heat after processing, remove canner lid and leave jars in canner for 10 minutes then remove jars from canner.  This prevents seeping.


This is a great kitchen tool to chop onions and peppers in small dices

Blue-Ribbon Corn Relish

8 cups corn kernels

3 cups chopped celery

1 1/2 cup chopped red pepper

1 1/2 cup chopped green pepper

1 cup chopped onion

2 1/2 cups vinegar

1 3/4 cup sugar

4 tsp dry mustard

2 tsp pickling salt

2 tsp celery seed

1 tsp tumeric

3 TBS cornstarch

 3 TBS water

Cumin-Pablano Corn Relish:  Prepare as directed, except substitute 1 1/2 cups poblano chile peppers for the green peppers.  Reduce vinegar to 2 cups and and 1/2 cup lime juice.  Substitute 1 TBS cumin for the celery seeds and turmeric.

Combine all ingredients except clear gel and 3 TBS water. Bring to a boil and simmer.  

In a small bowl combine the cornstarch and water and stir until blended

Add clear gel mixture to relish and cook til slightly thickened.

Ladle into hot jars leaving 1/2 inch headspace.  Wipe rims and apply hot lids.

Process in water bath canner for 15 minutes adjust for high altitude.

Makes 5 pints. 

Both recipes can easily be doubled.  I personally prefer the first one without celery.


Friday, August 11, 2023

3 Great Recipes for Canning Corn!


Canning Sweet Corn

 Sweet corn is one of those crops you just don't run out of ways to use.  There's eating it fresh on the cob, cut off, or grilled. Try an herb butter to add variety.  Freezing corn o,n the cob or as whole kernel cut off the cob, is always an option. 


You can also can corn in a pressure caner.  That's the focus of this post.  I'll share 3 recipes that use corn.  Since corn is a low acid food it must be processed in a steam pressure canner.  This ensures that all the bacteria, any spores and toxin are destroyed. If you need more information on pressure canning check it here is a great link:

 Ball Fresh Preserving: Getting Started


Steps to Prepare Jars and Pressure Canner


1.  I wash the jars in the dishwasher.  These recipes are raw packed so you do not have to keep jars hot.  Raw packed means you will pack raw unheated product in the jars.

2.  Prepare your lids and rings.  I never reuse lids but once you have canned a product you can remove the rings and use them again.  Have the lids in a pan of water.  When you need them heat to almost boiling.  I turn the heat down when bubbles start to form.


3.  Prepare your pressure canner. Check the gasket, the safety value, and vent pipe on a weighted gauge canner.  The vent pipe should not be clogged.  Hold it up to daylight you should be able to see daylight through it.  Remove any residue if you need to.  If you have a dial gauge it needs to be checked each year for accuracy.  Normally this can be done at the extension office.  I HIGHLY recommend that you follow the directions for your canner exactly as the manufacturer prescribes.

4.   Add the recommended water to the canner and a little vinegar to prevent mineral build up.  Now you are ready to prepare the corn.

Steps To Prepare the Corn:


1. Start with freshly picked corn.  Husk the corn,  wash it, and remove as much of  the silk as possible.   I husk the corn outside and compost the husks. Try a silk removing brush they are inexpensive and handy to have.


2.  Using a sharp knife, cut the corn off the cob.  I like to do this in a shallow bowl or small cookie tray with sides to keep the kernels contained.  Be careful not to scrape the cob or else you'll end up with more of a cream style corn.

3.  Put the corn in a bowl and remove any small pieces of silk. You can now use the corn in either of these recipes.

Canned Corn


1.  Add 1/2 tsp of salt to each pint jar and 1 tsp to each quart size jar. 

2.  Fill jars. Loosely pack the corn leaving 1" headspace.  Do not pack corn tightly because it will expand  as it processes. Following the headspace recommendations, will result in less liquid seeping out during processing.  Keeping an even pressure will also help with that.


Pack jars loosely leaving 1" headspace


3. Ladle boiling water over the corn leaving a 1 inch headspace

4.  Use a rubber spatula to remove air bubbles

5.  Wipe rims and adjust two piece caps.

6.  Put the jars in the canner.  Be sure to read the instructions for safety and to ensure you get a good product.

8.  Process pints at 10 lbs of pressure for 55 minutes.  Process quarts at 1 hour and 25 minutes at 10 lbs of pressure.  If you are above 1000 feet then use 15 lbs of pressure. 

9.  When the time is completed, just turn off the heat.  Let the canner cool completely.  Do not remove the pressure weight or lids while still hot or even warm. 

 I have found it takes about two large ears to fill a pint size jar. Decide whether you want to can in pints or quarts.  If you mix them you have to process using the time recommended for the quart size so I don't recommend mixing jar sizes.

Beautiful!


Canned Corn with Red Peppers and Basil


Follow the same instructions in preparing the corn.  Dice 3 medium red peppers.  I do this in a vegetable chopper.  It's absolutely one of my favorite kitchen gadgets.

Mix the corn and red peppers together and fill pint size jars. Remember to loosely pack do not shake or press corn into the jars.  There must be 1 inch headspace.  Into each pint jar add 1/2 tsp of basil.  Ladle your hot water over the corn leaving a 1" headspace.  Remove air bubbles.  Adjust lids and load in the steam pressure canner.

Process 55 minutes at 10 lbs of pressure.  If you are above 1000 feet use 15 lbs of pressure.

Vegetable Soup

 This makes about 5-6 quarts

 6 cups chicken broth
6 cups chopped tomatoes
4 cups peeled potatoes
4 cups peeled carrots
3 cups whole kernel corn
4 cups of sliced celery
2 cups green beans sliced 1" long
1 1/2 cups of diced onions (use the vegetable chopper)
1 Tbs dried parsley
1 tsp dried thyme
1 large minced garlic clove
1/2 tsp black pepper


You can add a little more or less of a vegetable you like.  All these are from our garden.

Try to chop all vegetables in one inch chucks.  Combine all these ingredients and bring to a boil.  Ladle the hot soup into hot, clean jars.  Be sure to leave 1" headspace.  Remove air bubbles.  Wipe the rims and adjust the lids.

Process quart jars for 75 minutes at 10 lbs of pressure or 15 lbs of pressure if you live above 1000 ft elevation.

This soup is a great base.  You can add a jar of drained, canned chicken or pork and any additional spices you enjoy for a quick and easy winter meal.  You can leave out the potatoes when you can it and then add some cooked macaroni to it instead.  I unusually add a jar of my canned Italian tomatoes. You can add some peppers to spice it up. Enjoy!