Saturday, December 19, 2020

Homemade Bread Recipes, Tips, and Supplies To Store


Winter decided to come the last week of February.  So much for spring fever.  We were have such beautiful days that the apricots  and forsythia bloomed. 


The raised bed garden


Perfect day to stay inside and bake some bread.  I have to try out my new grinder.  I have an electric K Tec grinder but wanted a hand grinder just in case we were in a no power situation.  

  My sweet heart of a husband motorized the Country Living Grain Mill and built a stand for it.  It's on wheels and can be wheeled in the pantry or used in the pantry.

The motor is from an old cement mixer.  Add a few pulleys and you get the 60 revolutions/minute that are recommended.
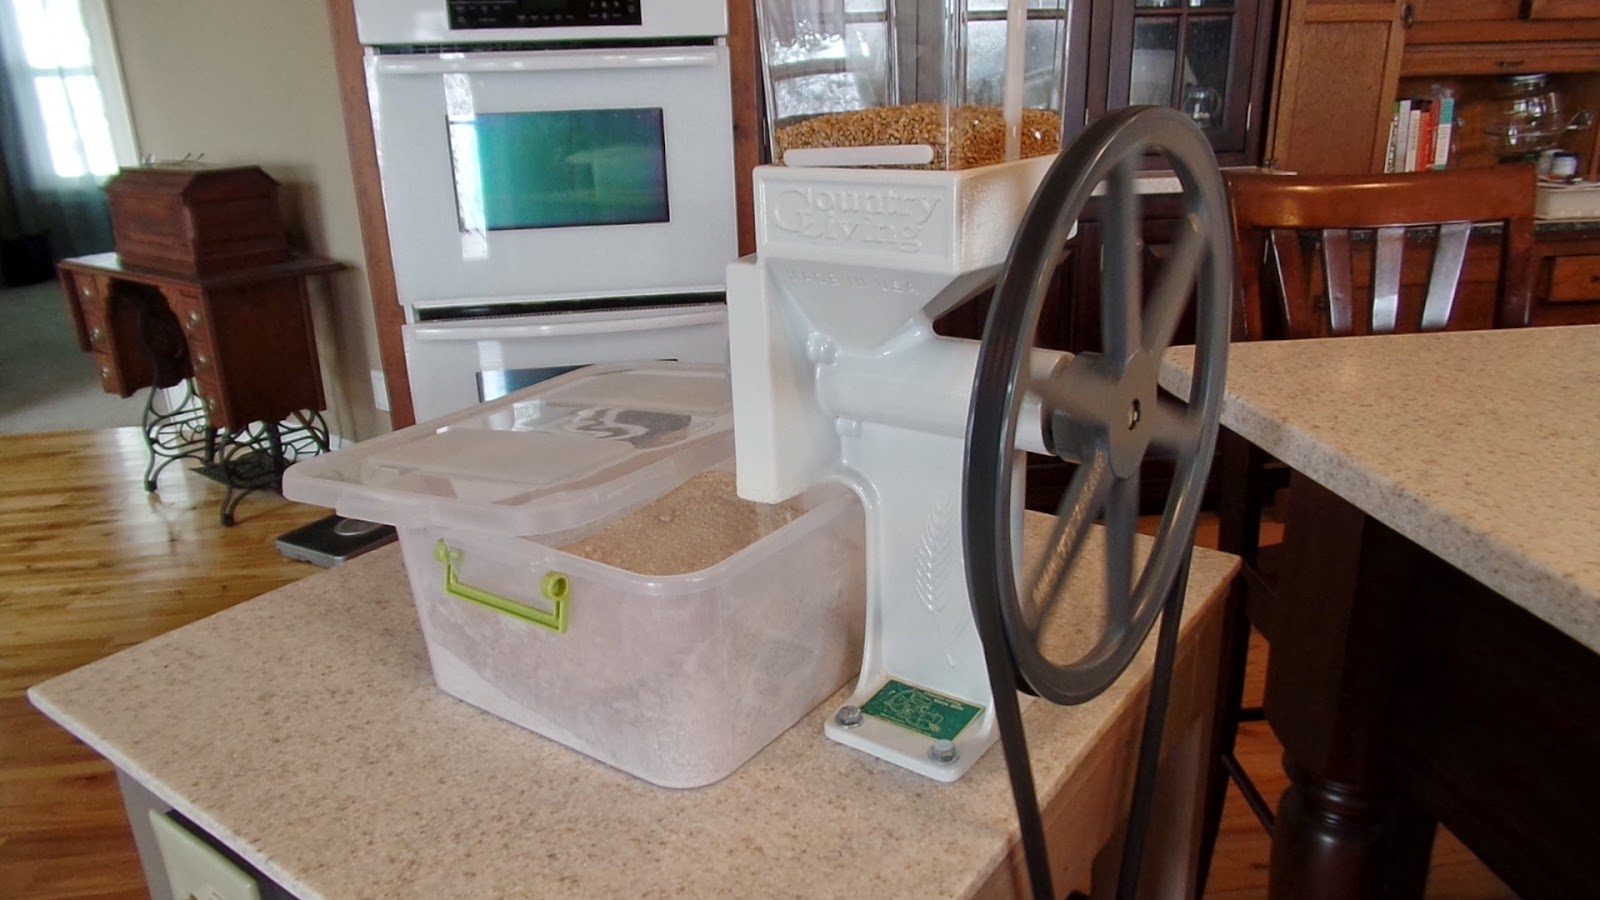
I love this mill.


Tips for making delicious yeast breads:
  • Add the least amount of flour possible for moist whole wheat bread. 
  • Instant yeast can be added directly to the recipe without proofing in water.
  • Active yeast must be proofed in water before being added to the recipe.  Water that is too hot will kill the yeast.
  • Gluten flour is made from high protein hard wheat.  It is important to keep bread moist, elastic, reduce crumbling, and extending the shelf life of bread. Whole wheat flour can also be used.
  • If using a mixer with bread hooks, add only enough flour until the dough pulls away from the bowl.
  • If mixing by hand add only enough flour so the dough does not stick to your hands.
  • Knead 6-8 minutes before shaping into loaves. 10 minutes if kneading by hand.
  • Lemon juice acts like a dough enhancer and give bread a light, fine texture. 
  • Dough enhancer has a shelf life of around 3 years
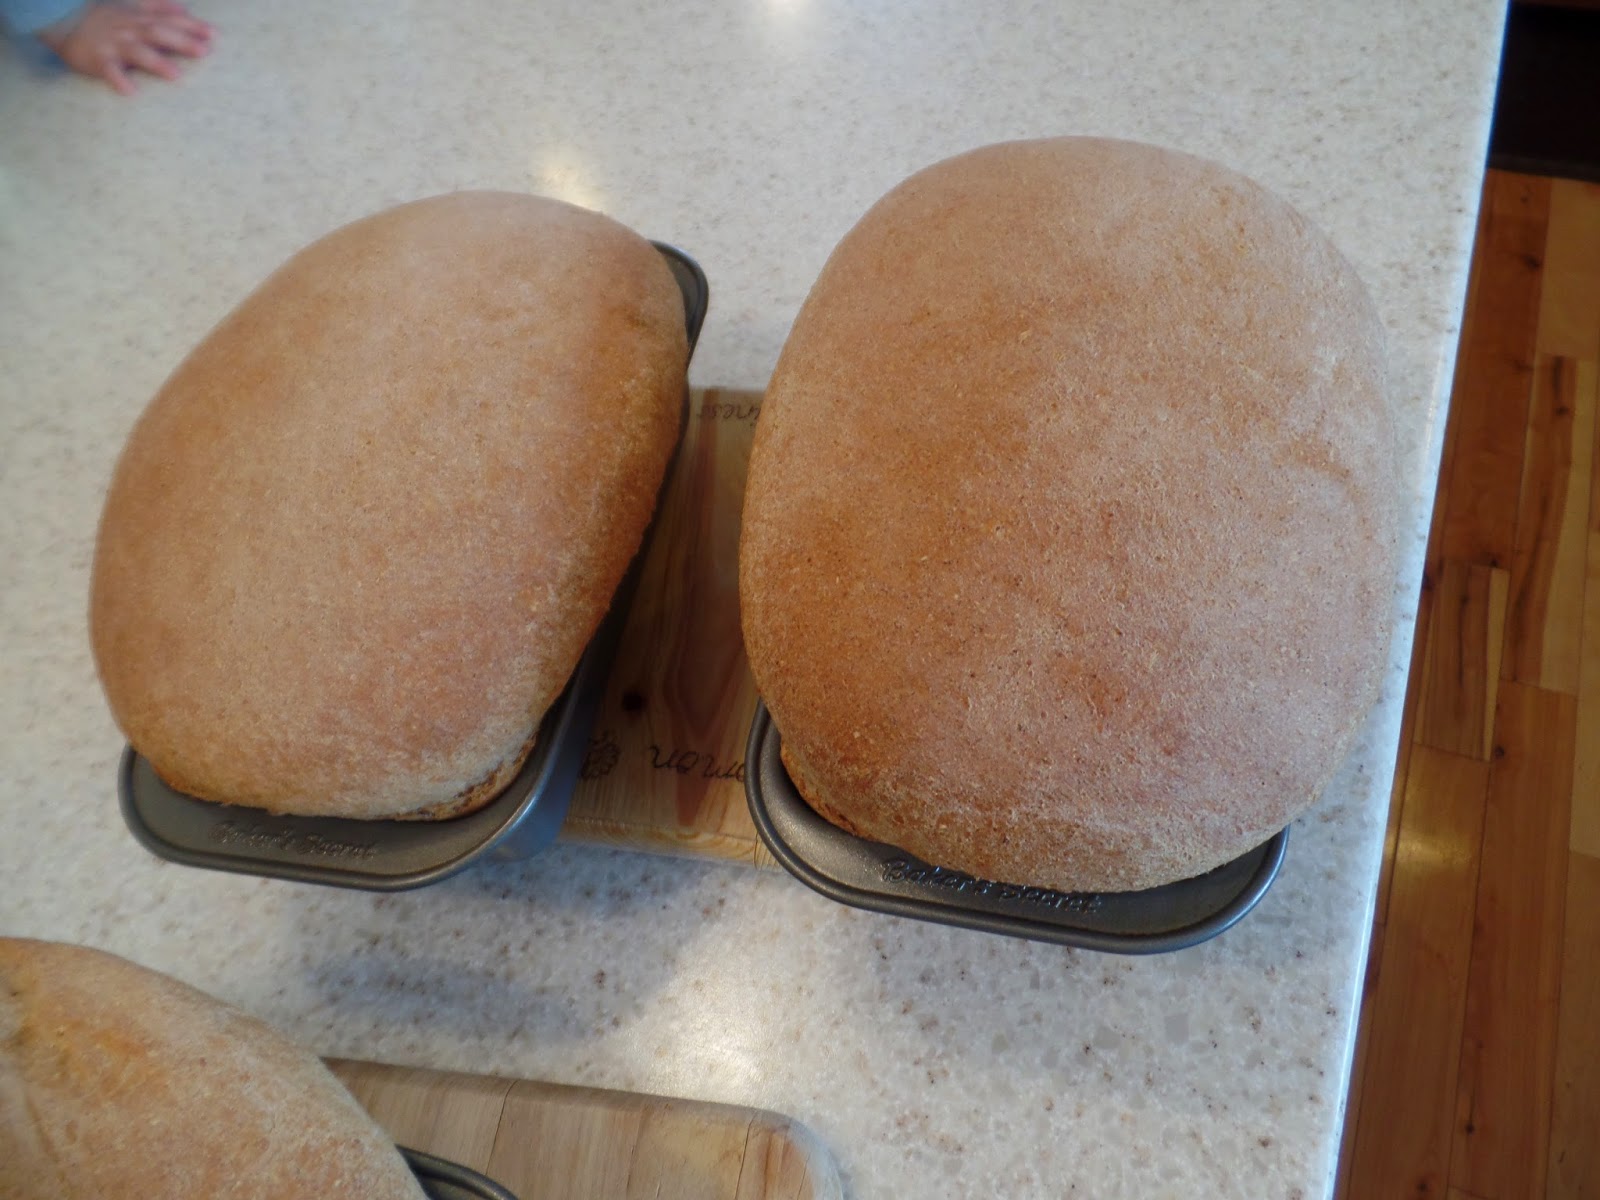

Fresh from the oven

Supplies to store to have one loaf of bread per day for one year:


  • 300-350 lbs. wheat
  • 61 cups gluten flour or whole wheat flour
  • 4 gallons of oil I like grapeseed, avocado, or olive oil
  • 46 lbs honey or sugar
  • 8 one pound packages of instant yeast
  • 8 lbs of salt
  • 4 qts of lemon juice or 4 cans of dough enhancer

This is from the book Emergency Food Storage in a Nutshell and is a good estimation but amounts may vary depending on your recipe.


2 Loaves (4x8)
1/3 cup oil
1/3 cup of honey or 1/2 cup sugar
2 1/4 tsp salt
2 3/4 cups hot tap water (120-130 degrees)
1/4 cup gluten flour or 1 1/2 Tbs of Vital Wheat Gluten
1 1/2 Tbs dough enhancer
1 1/4 instant yeast
7-8 cups of flour

4 or 5 loaves depending on pan size
2/3 cups honey or 1 cup of sugar
2/3 cup of oil
1 1/2 Tbs salt
5 1/2 cups hot water
3 Tbs. dough enhancer
1/2 cup high gluten flour or 3 Tbs Vital Wheat Gluten
2 1/2 Tbs instant yeast
14-16 cups flour

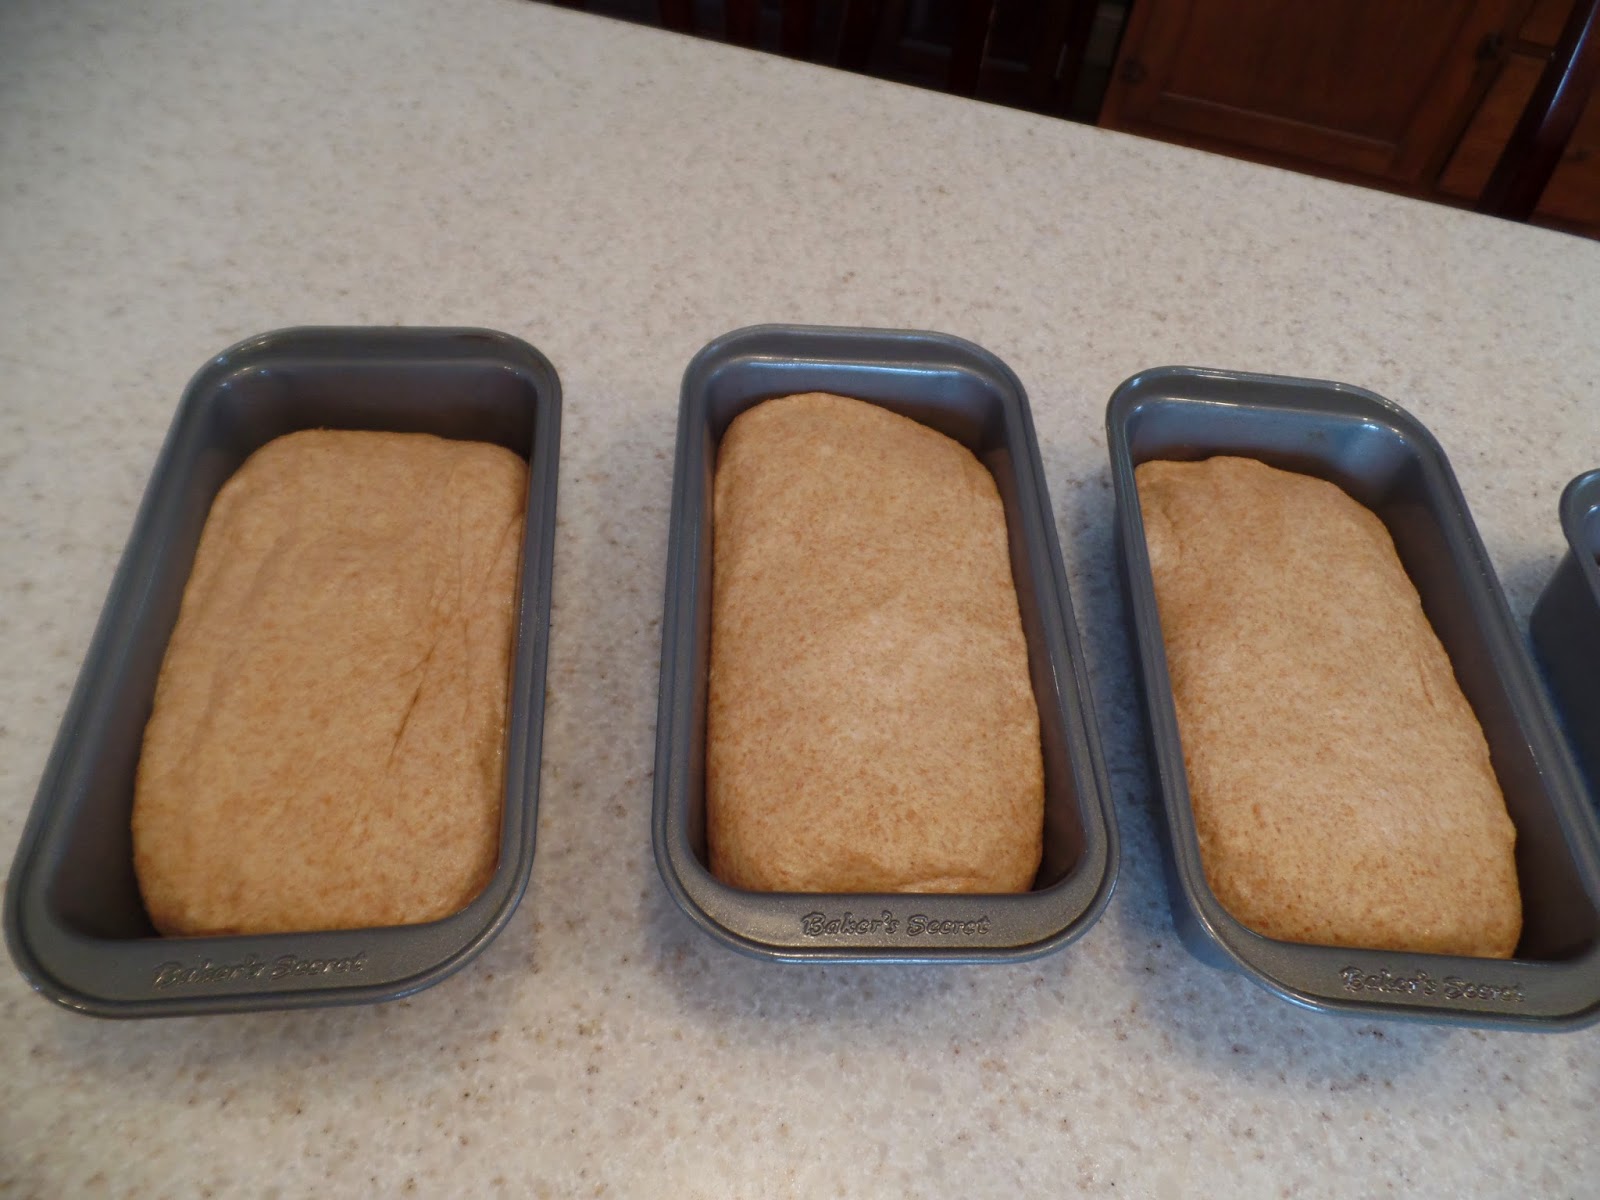
Combine the oil, honey, salt, and water in the mixer.  Add 7 cups of flour and mix.  Add 1-2 more cups of flour and the gluten flour, dough enhancer, and yeast.  Mix together. At medium speed add enough of remaining flour just until the dough pulls away from the sides of the bowl.  Knead for 6-8 minutes.  Divide and shape into loaves and put in oiled pans.

Let loaves rise on counter or preheat oven for one minute and turn off and let loaves rise for 35 minutes in a warm oven.  Bake at 350 for 30 minutes.  Cool for 10 minutes and remove from pan.


A warm slice of bread with homemade jam is wonderful on a cold winter day.

These recipes can be used with white or whole wheat flour be sure to use high gluten flour and white bread flour if you want to make white bread.  If using whole wheat you can substitute a couple cups of different whole grain flours.

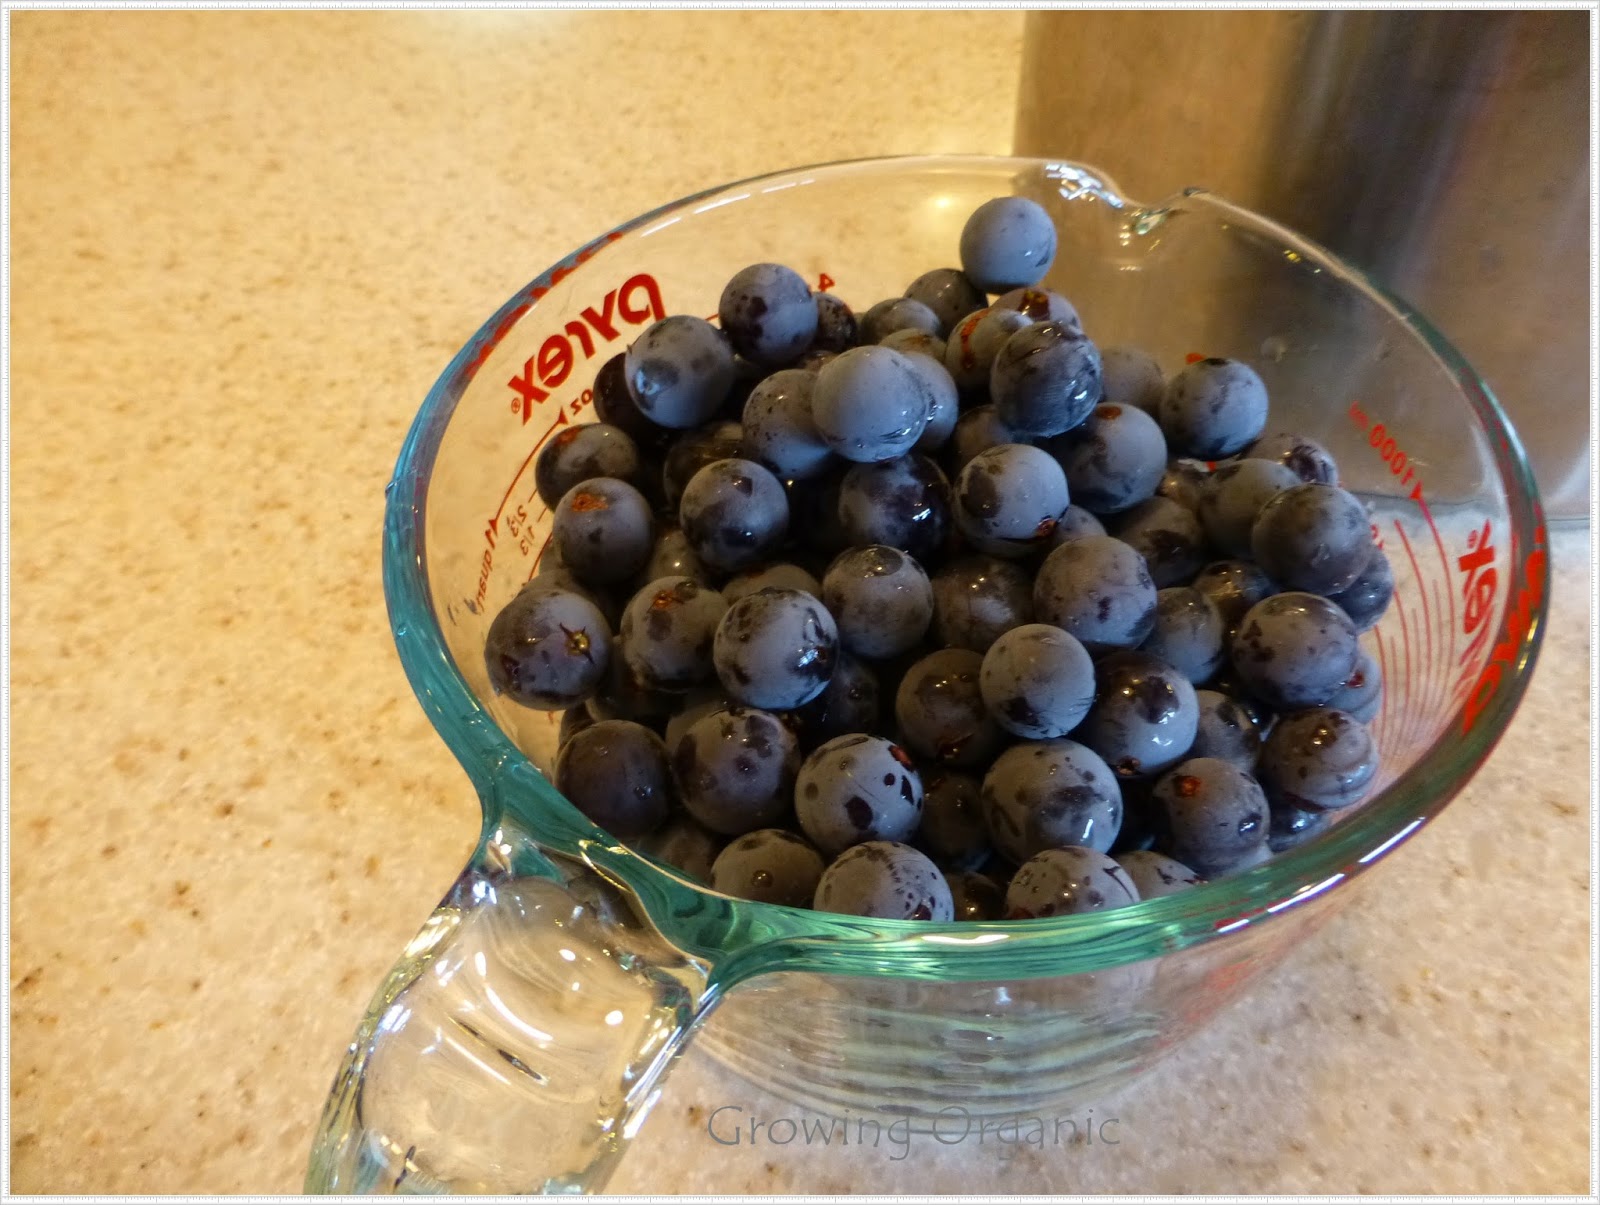
Try some delicious homemade jelly on your bread.  Here's some of my favorites


Monday, November 23, 2020

Kogigu Squash An Heirloom Winter Squash


Anyone else having a  love affair with heirlooms?  So excited that there is a renewed interest in these incredible vegetables and fruits with a heritage and history.  I decided to do a weekly post highlight an heirloom I have grown and love. Part of what keeps me so engaged in gardening is the endless heirlooms available. Planting them is like transplanting a small piece of  culture and history in your own backyard.  In a few square feet are crops from all over the world.  Who needs to travel when your backyard is an exotic destination of world wide produce.

This exquisite squash is a Japanese tradition. Kogigu (c. moschato) is a prolific producer of 1 to 2 lb squash.  I love the deep ribs and waxy texture.  This little beauty starts out a deep rich green and as it ripens it turns an earthy brownish orange.  The flesh is a beautiful bright orange with a sweet fruity taste.  It is very fine grained.


Keeping quality is an amazing 8 months.  These Kogigu were harvested in September of 2017.  They have been stored in my garage.  Ideally you would not want temperatures to get below 50 degrees to get the longest storage life.  So fantastic that I can still enjoy the fruits of my labors in the garden mid January.


Give this one a try.  It does need room to sprawl but was very easy to grow.  It will cross with other squash in the c. moschato family which includes butternuts and Long Island Cheese.  The puree makes great pies and desserts.  They can be prepared using your favorite butternut squash recipe.

Generally c.moschato  are more insect and disease resistant and do well in hot humid summers.  Check out Baker Creek Rare Seeds to purchase and start saving your own seeds.


Thursday, November 5, 2020

Growing Pomegranates


The pomegranate is one of the oldest fruits but only recently has it become the super hero of the super foods.  A small valley in southern Nevada has been growing these delicious ruby red jewels for generations.  Moapa Valley consists of the towns of Overton and Logandale. Until the pomegranate's recent popularity, very few people had tasted or were familiar with the pomegranate.  Since 2005, Moapa Valley began hosting the Pomegranate  Art Festival. Pomegranate jelly, syrup, and juice are the focus of this festival. Artisans and craftsmen sell a variety of crafts and art.  It's a wonderful event giving the pomegranate a weekend of fame and focus.


What is a Pomegranate?


While many people have tried pomegranate juice, many have not had the pleasure of eating the fruit fresh. The word pomegranate is from the Latin word "pom um granatum" and means "apple of many seeds."  That is a pretty accurate description.  They have a leathery skin of red or pink.  They have a crown- like calyx on the bottom. The fruit is technically a berry.   The seeds are encased in a juicy sac called an aril.  The arils are in compartments separated by membranes and pith. Pomegranates range in size from 21/2 to 5 inches in diameter.  There are sour and sweet varieties.  The sweet pomegranates are pale pink and white while the sour pomegranates are a beautiful ruby red.


Growing Pomegranates


Pomegranates are easy to grow in the right climate.  They do best in areas with dry, hot summers.  Zone 8-10.  They need high temperatures during fruiting to develop flavor.  They are very long lived bushes. They require full sun.  To maximize fruit production, avoid overcrowding bushes.


Pomegranates are a large bush from 12 to 16 feet tall.  They sucker from the crown and have stiff and sometimes spiny branches.  Very little pruning is necessary.  Basically remove dead and damaged wood.  They fruit on the tips of the branches.

They have minimal fertilizing requirements and are drought tolerant when established.  Fertilizing in early spring with bone meal and compost are helpful for good fruit production.  While drought tolerant, irrigating will benefit fruit production also.

Pomegranates are relatively free of most pests and diseases.


Health Benefits of Pomegranates


The powerful antioxidant,  punicalagin, is what gives the pomegranates its fantastic health benefits.  Antioxidants help guard against free radicals which cause oxidation resulting in tissue and organ damage. The pomegranate is also loaded with Vitamin C and other antioxidants.


Some health benefits of pomegranates:

  • Anti-cancerous
  • Builds immune system
  • Lowers cholesterol
  • Lowers blood pressure
  • Relieves inflammation, arthritis, and joint pain
  • Inhibits platelet aggregations that many lead to heart attack, stroke, and embolisms

Harvesting pomegranates


Pomegranates are ripe around 60 days after they bloom.  The fruit matures in the heat of summer. They are ready to harvested in late October. Some say they are ripe when they have a metallic ring to them when tapped.  Cut the fruit off the bush to avoid damage to the limbs.


Using Pomegranates


Pomegranates can be eaten fresh.  They are delicious. Score the leathery skin and break them apart.  Pomegranate juice stains so do this over a bowl with an apron on.  You can add a little cream or cool whip for a nice pomegranate salad. But honestly they are delicious fresh. They can also be added to any salad.  

Pomegranates can also be juiced and the juice  can be used fresh or added to other juices. You can drink the juice fresh without adding any sweetener for a healthy and delicious juice. The juice can also be used to make jelly and syrup.


The lighter colored pomegranates are sweet and the dark red the sour variety.

Juicing is a messy business and best done outside. My family used a neighbor's homemade juicer powered by a  tractor.  My husband is already figuring out how to make a cider press and pomegranate juicer powered by our backhoe.  Sounds interesting!  A heavy duty, metal citrus juicer works for a small scale juicing. It needs to be made of non-corrosive metal.

The juice my family did this year was a combination of sweet and sour pomegranates and was absolutely delicious.  No sweetener is needed.

Pomegranate jelly is a favorite in our household.  We always save some of the juice for a couple batches of jelly. 


Monday, October 19, 2020

Good For You Garlic


Soft neck garlic ready to harvest.  Two or three leaves have turned brown.


Nice and large.  Garlic has not split and will cure and store well


You can cook with your garlic fresh. It must be cured for storage


Curing on a screen on my porch.


Garlic is an easy crop to grow and in my book an essential ingredient in most dishes.  In addition to being delicious it is also extremely healthy for you. 

Harvesting Garlic


Your garlic is ready to harvest when two or three of the leaves have turned yellow or the tops have fallen over. In zone 5 that is in early to mid July.  I use my small trowel to loose the soil around the garlic and gently pull it up.  Just brush some of the dirt off the remainder will be easier to brush off after the garlic is cured.  Do not rinse. 

Curing Garlic

To cure your garlic put the bulbs on a screen and keep outside away from direct sunlight.  This could take 1 to 2 weeks.  They are done when the skins are dry and paper-like and the necks are tight.  Brush remainder of dirt off, cut the tops leaving an inch of stem, and store in a cool dry place.  Garlic can store from 5- 8 months. 

Choosing Garlic:

There are hard neck, soft neck and elephant garlics.  The soft neck is what you buy at the grocery store.  The hard neck has a stiff neck with single cloves around the neck.  The soft neck has many more randomly placed cloves and is the one used in braids.  Elephant garlic is very mild with massive cloves.  There are many different varieties of soft and hard neck. 


To start with it is best to purchase from a garden center or mail order because you are starting out with a disease free crop. Summer is the time to mail order because they sell out rather quickly.  Once you get a variety you are happy with you can save and plant the largest cloves. 

Planting:

Garlic needs to be planted in the fall one to two months before a freeze. I usually plant in October. You can mulch over if desired. Plant 3-4 inches deep if not mulching.  Make sure the pointy side is up.  In the spring it will start sending up green shoots the same time as daffodils.

Care:

Garlic likes a soil rich in organic matter and even moisture.  Hard neck garlic sends up a flower bud called a scape.  Cut those off with scissors so the energy of the plants is directed to bulb and clove formation. You can actually cook with scapes if you desire.  

Wednesday, September 30, 2020

Concord Grape Jelly


If you liked store bought grape jelly, you will love making your own from vine ripe grapes! This is an amazing jelly sure to be a family favorite.


Juicing Grapes and Other Soft Fruits


1.  Wash the grapes and stem them.

2.  As you stem them put them in a quart measuring cup.  With each quart of fruit you will need to add 1/4 cup to 1/2 cup of water to a sauce pan.

3.  Bring fruit to a boil, turn it down and let it simmer. As the fruit softens mash with a potato masher.

4. Strain the softened fruit through a dampened jelly bag or through a Victorio Sauce Maker and let the juice drain into a bowl

5.  I put this juice in a half gallon jar and let it set overnight in the refrigerator.  Grape juice has a lot of sediment that you don't want in your jelly.  It will make it look cloudy.

6.  The next day in a large measuring bowl put food grade cheese cloth over the top and hold it in place with a rubber band.  Without shaking or stirring contents of juice pour the juice through the cheesecloth.  You will need 4 cups of juice.  Do not pour out the sediment that settled to the bottom.


Making Concord Grape Jelly


4 cups of Concord grape juice
7 cups of sugar
1 pouch of liquid pectin

Mix the juice and sugar in a large saucepan.  Bring it to a boil and add the liquid pectin.  Return to a full rolling and boil for 1 minute.

Skim the foam off the top. There is a lot of foam with this jelly so do not double the recipe and use a large pot. Ladle jelly into hot sterile half pint jelly jars.  Adjust two piece caps.  Process in a water bath canner for 10 mins.  At 5000 ft add another 10 minutes.

When the time is up turn off the heat and remove the lid of the canner.  Wait another 10 minutes before removing jars from the canner.  Let them rest till cool on the counter.

This makes a beautiful, clear jelly that is so delicious.


 "Wish I hadn't Done That!" Wisdom

After the juice has settled for a day, do not use milking filters to strain the juice.  I tried this and it barely dripped through the filter. It would have taken days to filter. I recommend cheese cloth.


Saturday, September 19, 2020

Pear Preserves & Pear Butter


I've been canning pears this week.  I always prepare ahead by looking through my canning books, which I love to collect, and write down favorites and look for something new to try.  I thought I would share some of the new and old favorites recipes for pears.


Ginger Pear Preserves

This is a gorgeous looking preserve!  The pears, ginger root, and touch of lime make it a delicate, delicious preserve.  This is one of my favorites.  

If you are not familiar with preserves they are similar to jams but with chucks of fruit suspended in a soft jelly.  No pectin is used and they are cooked until a gel stage is reached.  Preserves are delicious on breads and muffins but also make ice cream and cake so much better!  Try them with crepes, on pancakes or mixed in your breakfast oatmeal.

5 1/2 cups  finely chopped cored peeled pears
Grated zest and juice of 3 limes
2 1/3 cups granulated sugar
1 tbsp of peeled and grated ginger root

1.  Prepare your canner, jars, and lids.
2.  In a large stainless steel saucepan, combine pears, lime zest and juice, sugar, and ginger root.
3.  Bring to a boil over medium heat stirring to dissolve sugar
4.  Boil gently stirring until mixture thickens about 15 minutes.
5.  Remove from heat and test.
6.  If gel stage has been reached skim off foam.  If not continue cooking for 5 more minutes and repeat gel test.
7.  Remove from heat and stir for 5 minutes to help fruit stay suspended
8.  Ladle hot preserves into hot jars leaving 1/4 inch headspace, adjust lids and rings
9.  Place jars in canner and process for 10 minutes.  Adjust for altitude.  I have to process for 20 minutes.
10.  Remove canner lid and wait 5-10 minutes then remove jars to cool.


Gel Test

Dip a cool metal spoon, I keep it in the refrigerator, into the boiling soft spread. Lift the spoon and hold it horizontally with edge down so the syrup runs off the edge.  As the mixture cooks the drops will become heavier and will drop off the spoon separately but two at a time.  When the drops join together and "sheet" off the spoon the gel stage has been reached.

Refrigerator Gel Test

Chill a small saucer in the freezer.  Place a teaspoonful of soft spread on the saucer and in the freezer for 1 minute.  Be sure to turn off stove and remove the spread from heat so it does not burn while you do this test.  Remove the saucer from the freezer and push the edge of the spread with your finger.  If it has reached gel stage the surface will wrinkle when the edge is pushed inward.


Pear Butter

Butters are smooth creamy spreads.  They are made by slowly cooking pulp and sugar.  Spices are added.  You must have patience.  The long cooking time evaporates the moisture thickening the spread.

To Test for Doneness
Butters are cooked until they hold their shape on a spoon.  To test for doneness chill a saucer and place a spoonful of spread on the plate. When liquid does not separate and forms a rim around the spread it is done.

7 lbs of pears peeled, cored and coarsely chopped
Grated zest and juice 1 lemon
1/2 cup of water.

Combine above ingredients.  Bring to a boil and gently boil for 15 minutes.
Working in batches press mixture through a food mill.  

Measure 8 cups of pear puree.
4 cups sugar
Grated zest and juice of one orange
 1 tsp cinnamon

Stir in sugar, orange juice and zest and cinnamon..
Bring to boil reduce heat and simmer until it thickens and holds its shape on spoon.

Ladle into hot jars with 1/4 inch headspace.  Process 10 minutes adjust for altitude.  I process 20 minutes.

Remove canner lid and let it set 5- 10 minutes.  Remove jars to cool.

Butters make an excellent filler for layer cakes.  For another delicious dessert slice a pound cake spread with butter, top with fresh fruit, vanilla pudding and whip cream.  My favorite way to use butters is to spread them on grilled cheese or ham and cheese sandwiches. 


Sunday, August 16, 2020

Carrots


Carrots

I love digging carrots. The smell of rich fertile soil and the sweet aroma  makes digging these  bright orange or deep purple tapered roots enjoyable.  After growing your own carrots, store bought carrots will seem bland and mealy.  A fresh carrot is sweet and so crisp.  This is one versatile crop I can't plant enough of.


Tips for Growing Great Carrots 

  • Carrots grow best in a soil free of clods and stones. The roots twist if the soil is rocky. 
  • Incorporate lots of organic matter. 
  • Do not use fresh manure it causes hairy roots.
  •  Excessive nitrogen will also cause hairy roots. 
  • Moisture fluctuations cause root disorders, slow leaf development, and bitterness.
  • Carrots germinate best when soil temperatures are 55-65
  • Poor germination results if temperatures are above 80 degrees
  • Carrots taste and grow best if they mature quickly before the heat of summer.
  • They do not like to be water stressed and need thorough watering

Planting:

Some people have difficulty getting carrots to germinate.  They can be a bit temperamental.  Carrots need to be planted shallow and kept moist.  They are slow to germinate.  Plant by mixing with sand or peat moss and broadcasting over the soil.  This method will require thinning.  If you are not a fan of thinning then run  your finger in a line in the soil. Sprinkle seeds in tiny little furrow you made and gently brush a little soil over seeds. Do not plant too deeply. The seeds will not germinate if allowed to dry out so water frequently especially on a windy day. This is what makes them temperamental especially if you have winds that dry out the top layer of soil. To prevent drying out it is helpful to cover the area with a row cover or weed clothe until germination.  You can water right over the clothe.  Just be sure that you remove it when they begin to germinate. The clothe warms soil in addition to preventing the soil from drying out in the wind Continue to water at least 2x a day until seedlings are one inch high then you can reduce watering to once a day. 

Succession plant every two weeks in spring and then again in late summer for fall and winter crops. This will give you a continual harvest.


Harvesting:

Carrots are harvested when roots begin to size up between 70-100 days.  Use a digging fork or hand trowel to loosen the soil or the carrots will break off.  Trim tops to 1”, brush dirt off and they store well in the refrigerator for months. Do not wash before storing unless extremely muddy. Do not store with apples or pear which give off a gas that makes the roots go bitter.  Most root crops store very well in the vegetable bin of your refridgerator.  Follow the same procedure for beets, parsnips, and turnips. If you are fortunate to have a cool basement or root cellar they are a great long term storage crops.  When it comes to storage not all carrots are equal to the task.  Let's learn about a few varieties and types of carrots. 


Varieties:

Most do well. My favorites are Sweetness III, Sugarsnax, Tendersweet,  Red Cored Chantenay, Cosmic Purple (only the skin is purple),  Parisian carrots are a fun round stubby carrot which is very sweet. Purple Dragon is a gorgeous dark purple carrot all the way through and very sweet.  A good heirloom is St. Valery.  Mokum is a good juicing carrot

Uses:  Nothing beats eating garden fresh carrots, but they are also a great crop for long term storage and have numerous ways they can be preserved.  They can  be juiced and added to smoothies. You can steam carrots or roast them with other root crops.  They can be pressure canned and pickled in a water bath canner.

Good Companions:  Chives, Garlic, Leeks, Leaf Lettuce, Onions, Parsley, Peas, Radish, Rosemary, Sage, Beets, Tomatoes.  Dill is not a great companion for carrots.

Nutrition: One 7 inch long carrot has only 35 calories and supplies 270% of Vitamin A and 10% of vitamin C.


Types of Carrots:

The roots of carrot varieties vary in the way they grow, their storage life, and taste.  They are classified as Chantenay, Danvers, Imperator, Nantes, and miniatures.  The following is fro USU Extension office.


Chantenay:
55 – 70 days, Cone shaped with broad shoulders and rounded tips.  Rich, sweet flavor.  Good storage . 

Danvers:
70 – 80 days, Thick rooted cylindrical shape, with yellowish cores.  Good for juicing and storing          
Imperator:
55-100 days, Long tapered roots with stocky shoulders.  Store well. Processes well and holds flavor 
       
Nantes:
55-70 days Straight roots 5-7 inches long.  Sweet flavor and crisp texture.  Limited storage but exceptional for fresh eating.
    
Miniature:
50-60 days     Less than 5 inches long can be cylindrical.  Quite sweet.  Difficult to peel.  Limited Storage 

I suggest planting a variety to use for fresh eating, processing, and storing.  You won't be disappointed.


Here's a link to some good carrot recipes.  Carrots are great with other  root crops so be sure to try the roasts root crop recipe.


Wednesday, August 12, 2020

Blackberry Preserves


Just the name preserves takes you back in time to the county fair blue ribbon contest and great-grandma's kitchen. Imagine big delicious whole blackberries that mound up on toast, scones, or homemade bread. 

Most people are unfamiliar with preserves.  Unlike a jam or jelly, a preserve is prepared to maintain the natural shape of the whole fruit or berry.  It is a soft spread with whole pieces of fruit or berries suspended in a thick syrup. The fruit is neither chopped or crushed in a preserve.


To make the best preserves the berries should be fresh and fully ripe.  Most blackberries from the supermarket are underripe so hopefully you have your own berry patch or a neighbor willing to part with some homegrown berries.

Because the berries are left whole, one key to successful preserves is to replace the air and part of the liquid in the cells of the berries with sugar.  This is reason for combining the berries with sugar, allowing them to set and macerate for a while.  During this time, the fruit absorbs some of the sugar and releases some juice allow the berry to better maintain its shape.

Another pointer, each batch needs to be prepared separately.  Do not double the recipe.


Blackberry Preserves

Make 6-7 half pints

7 cups whole firm, ripe fresh blackberries

6 1/2 cups of sugar

1/2 tsp unsalted butter

1 (3oz) pouch liquid pectin

1.  Rinse the fresh berries in cool water and drain well

2.  In a large pot, alternately  layer the black berries and about half the sugar called for in the recipe.

3.  Let this stand for 1 hour.

4.  Place the pot over medium heat, stirring frequently  and heat the mixture until the sugar is partially dissolved.

5.  Add the remaining sugar 1 cup at a time stirring gently between each addition.

6.  Heat until the sugar is completely dissolved.  Stir in the butter.

7.  Bring the mixture to a full rolling boil, stirring constantly.

8.  Stir in the contents of the pectin pouch.

9.  Boil, stirring constantly, for 1 minute.

10.  Remove the pan from the heat and skim off any foam.


11. To prevent floating fruit, allow the preserves to cool 5 minutes before filling the jars.

12. Ladle the preserves into hot jars, leaving 1/4 head space.


13.  Wipe jar rims and threads with a clean, damp cloth and put heated lids and rings on.

14.  Process half- pint jars in a water bath canner for 10 minutes add an additional 10 minutes for high altitude.  Pint jars process for 15 minutes plus altitude time adjustment.


Enjoy these delicious preserves on bread, waffles, pancakes, or even ice cream.